Cluster with black dash trim off of it.
Cluster Fix for 94-95 Impala SS
&
94-96 Caprice
Classic
This is only a reference, I take no responsibility for this procedure. Just a guide for a fix. Use at your own risk but, it worked for me.
*Special thanks to David Lovely & Ken Alpern for finding this fix for a very annoying problem.
This can be done in the car with just a little time and patience. If you want to do it out of the car then you will have to drop the column to get it out.
Here goes:
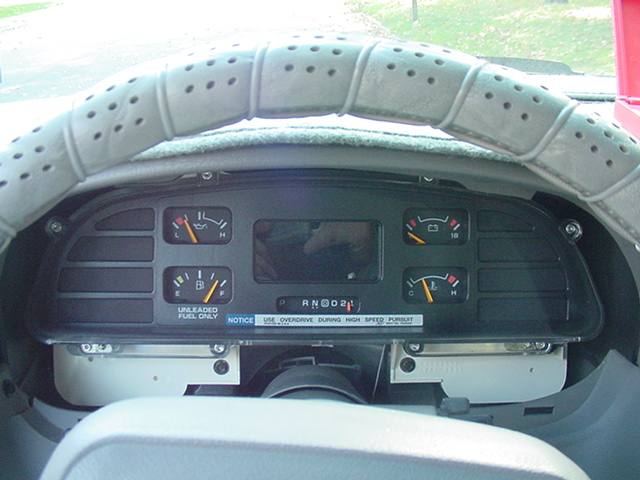
1) Remove the black trim around the cluster. This is held on by 2 7MM screws on the top of the trim piece. There are also 2 clips on the bottom. Remove the screws and give it a firm but gentle pull towards the wheel.
2) Now you will see 8 silver T-10 Torx screws holding the cluster together. First turn the key to the off position, not the lock position, and put the gear selector in Low 1. Make sure you have the parking brake on as well! (see pic below)
Cluster with
black dash trim off of it.
3) Now here is where you should take your time and be sure to pay attention to how this comes apart. (In other words, send everyone else to do something and leave you alone!) Take out the 8 Silver Torx screws and put them aside. Now the whole front of the cluster is loose. Take off the clear cover, then the large black trim behind that, then the thin black piece, and the shift indicator with the green window. The indicator with the window you will have to put aside but remember BE CAREFUL of the cable.
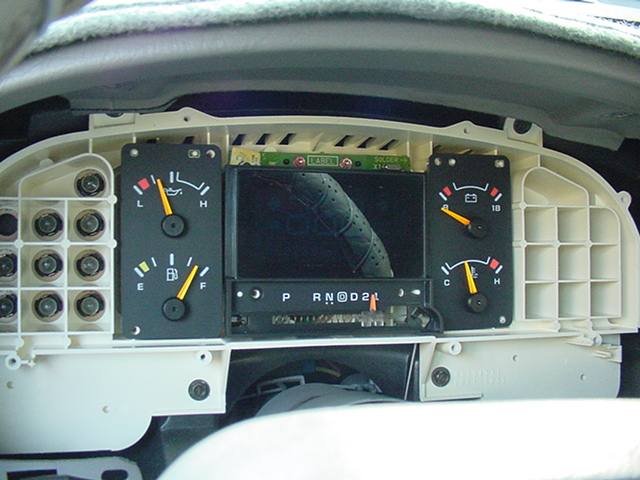
Be careful of the
green window with the shift indicator attached. This you will have to put over
towards the right side.
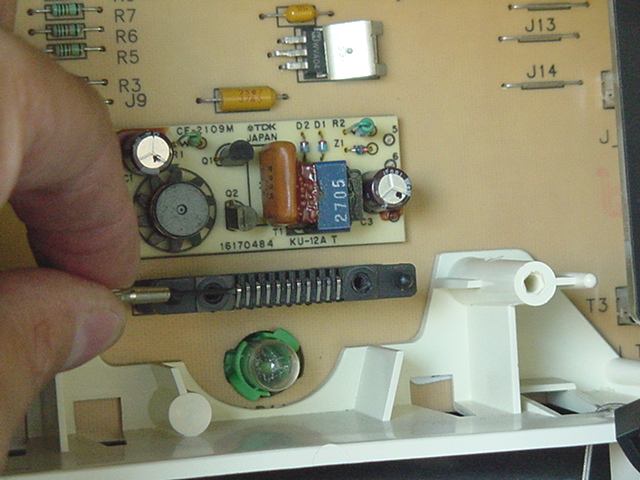
4) Now you will see the display in front of you. There are 4 RED TORX screws holding this to the cluster. Remove these screws but be careful because these are the only things holding this display to the cluster. There are no other wires or nothing. This is the problem. (See pic below)
Notice the shift
indicator off to the rightside.
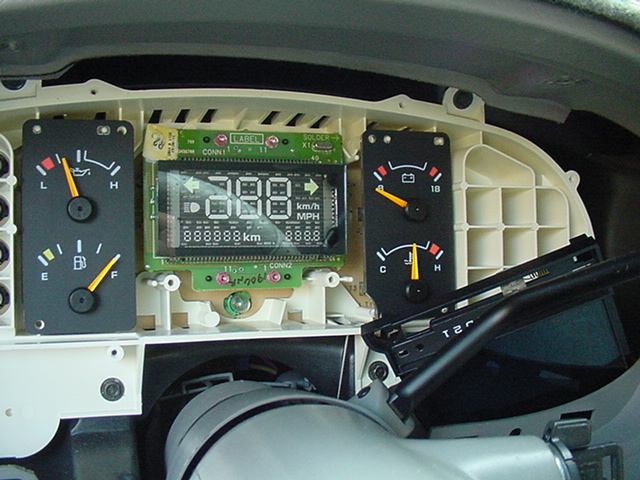
5) When you the display out, you will see two rows of soldered dots on it, one set on top and one set on the bottom. Clean these with contact cleaner or alcohol. You will also see two black towers with little spring loaded tabs in the cluster. Clean these with alcohol also. I had two that were stuck down so I pulled them up very carefully and put a bit more tension on them and all the others with a small jewelers screwdriver.
Here are the 2
black towers with the spring loaded tabs.
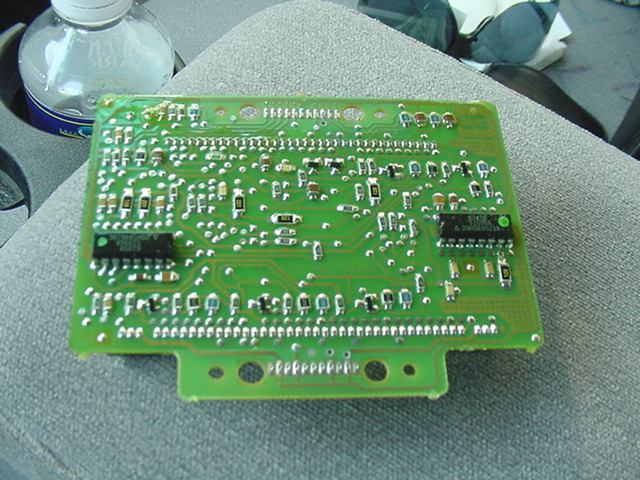
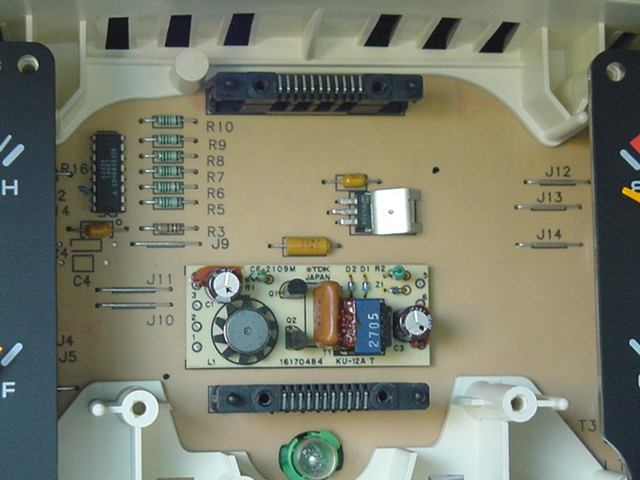
Here is a shot of
the back of the display. Notice the 11 soldered dots on the top and bottom.
Clean these with alcohol.
"GENTLY" pull up
on these tabs and put a little more tension on them. Also clean these with
alcohol as well.
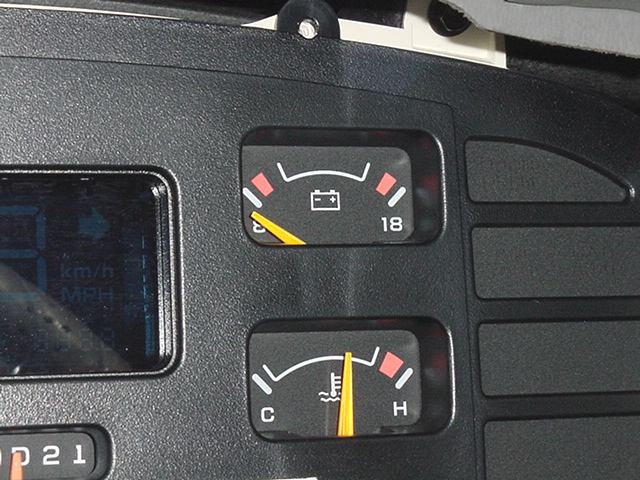
When putting the
cluster back together watch out that you don't break the Battery gauge's
needle.
6) Now just reverse the procedure I gave you here and you should be in business. Just be careful of the Temp. Gauge needle when you put the thin black trim piece back in place. What I did was put the cluster back together and try it before I put all the silver torx screws back in it.
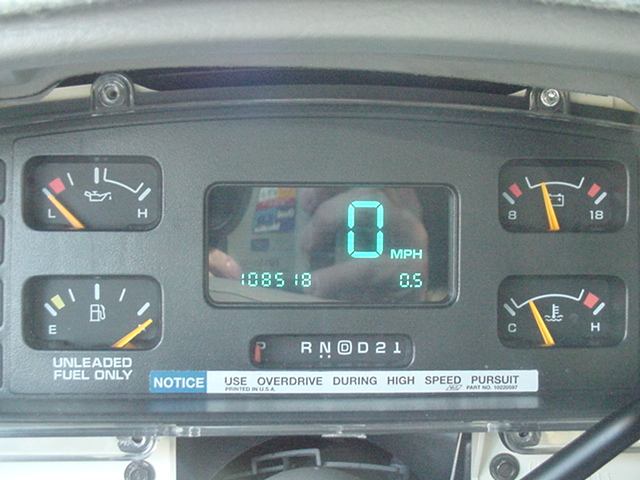
Notice that the display is nice
and bright now.
This sounds a lot harder then it really is. Once you get into it it's not that bad. If you don't feel comfortable doing this, let a friend that has taken a dash apart before help you. You just have to go slow and don't do it when you are in a hurry. This whole thing should take about an hour or a little less. If you are not clear with any of the steps above, let me know and I'll try to clarify it a bit more for you.
Good Luck,
Howie Hoffman
President, NJ BEASST